2017 Review and 7 Easy Lightroom Tips for the New Year!
 |
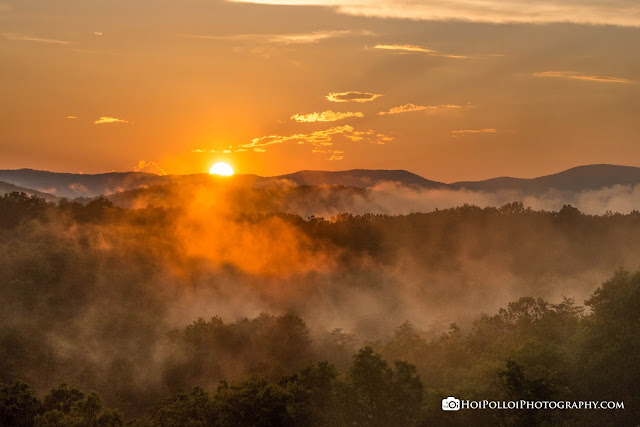
| Sunset in the Blue Ridge Mountains of North Georgia |
As 2017 comes to a close, I always like to take stock of my year and reflect and give gratitude for the things I have accomplished. Also, as a thank you for those of you who follow my work and read my books and blog, I wanted to share seven quick and easy tips and quick fixes that you can do in Lightroom.
First, I am so thankful for so many things that have happened in my life this past year. I have been doing commercial photography since January, and have been on several adventures to North Georgia and Maryland and met some amazing people and made some great friends!
 |
| The beautiful blue water of Deep Creek Lake in Maryland. |
I published my second photography book, The Simple Guide to Great Composition. I had the honor of meeting Scott Kelby at his workshop in Nashville and hosted his Worldwide Photowalk in my hometown of Morristown, TN, and was honored to have so many great folks attend, some from as far as North Carolina and Nashville!
 |
| Scott Kelby's Worldwide Photowalk, Morristown, TN, October 7, 2017 |
This year I topped last year's sale price of a single photo, hopefully a great sign that my work is getting better and getting attention. I was published in eight GuruShots articles and once in Only In Tennessee. I was floored when two of my photos were published by Photoshop User magazine in their September issue. That was a truly defining moment for me! I view what gets published in that magazine as cream of the crop, and completely humbled to be there among the greats. And I was humbled again when KelbyOne featured my work later in their Member Monday article.
 |
| Pages from Photoshop User magazine - September 2017 |
I thank you all for your support and encouragement, for all the likes, shares, and compliments. You guys are the spark that keeps my light shining. <3
I want to encourage you to make a list of your own accomplishments for the year. I am always moved when I see them together and even more grateful for them. If I can do it, you can do it. Never give up on your dreams, never stop striving for more, never be satisfied with your skills, keep learning, keep pushing yourself. (By the way, I created a Pinterest page for my publications and accomplishments and it's a great way to keep up with them!)
Teaching others and sharing ways to help people pursue their passion for photography and art is one of my favorite things to do. We all deserve to live our dreams, and as we learn and progress, I believe it is important that we share knowledge and lend a helping hand to those who follow in our footsteps.
With that said, here are the tips I promised. I hope they make your life easier and your photography better in the coming year.
Seven Quick Lightroom Tips
1. Undo
Pressing Command (Mac) or Control (PC) and Z will undo, so don't be afraid to try these tips.
2. Snapshots
Another safe way to experiment with your photos is to use Snapshots, located in the left panel between Presets and History. If you have a version of your photo that you want to save, you can create a snapshot that you can go back to. This is nice when editing. If you get a look you want, but want to try some other edits, all you have to do is click the + sign on the Snapshots panel.
A window will pop up asking what you want to name it (default is date and time).
Once you click create it will show up under Snapshots where you can click to go back to it.
3. Create Virtual Copy
Creating a virtual copy is another way to experiment with multiple versions of an image. It creates an exact copy of the image in the state it is in. Meaning, if you have done edits, those will be the same in the new copy. All you have to do is right click on the image and choose Create Virtual Copy.
4. Convert to Black and White
Sure, there are lots of great black and white conversion software (Nik Silver Efex is a personal favorite), but a quick and easy way to convert your color image to black and white is via the HSL / Color / B&W panel. All you have to do is click on B&W at the top of the panel, then you can move the sliders below to make different colors lighter or darker in your image.
5. Spot Removal
This tool is fantastic for getting rid of spots from dirty sensors. You just click on the tool and use the brush to click on spots you want to fix. You have the option of Clone or Heal. Clone is an exact copy of pixels from another area of the image, and heal actually takes in the color and tones from the surrounding area. If one doesn't work, give the other a try. Quick shortcut: You can change the size of your brush by using the scroll wheel of your mouse.
This tool also includes a very helpful overlay that helps you see the spots you might otherwise miss. By clicking the checkbox for Visualize Spots (located under your image in the bottom left corner)
and moving the slider to the right, you will see spots that might have blended into the background and will come back to haunt you in printing or in larger views of your photo. When you are finished, just uncheck the box to go back to normal view.
6. Crop & Straighten
Just to the left of the Spot Removal tool is the crop tool. It has some very helpful features. When you click on it, the Crop and Straighten panel opens. Let's go through each of these.
Aspect - here is where you can set the aspect ratio. Say you want to know what your photo will look like cropped to a 5 x 7. You can click where it says Original and a list of options opens where you can choose different sizes or choose Custom to set your own. Note the lock symbol. If it is locked you will be able to resize the image while keeping the chosen aspect ratio. If it is unlocked (clicking on it toggles lock and unlock) you can drag your crop to any size as it disregards aspect ratios.
Angle - here is where you can straighten that crooked horizon line. There are three ways to use this tool. You can click on the level icon and use it to draw on a horizontal or vertical line that should be straight; you can use the slider; or you can drag the corner.
Constrain to Image - check this box if you don't want to have white edges because of the adjustments you made in straightening. Remember, you will loose some of your images if you do this. I sometimes leave the white edges and fix them in Photoshop, but that is another tutorial for another day. :)
7. Transform
Somewhat like the straightening tool but much more powerful. The Transform panel lets you do much more involved corrections to straighten and correct your image. This is great for correcting skewed buildings/architecture/etc. For this quick tip, I suggest using Auto as it fixes things very well most of the time. Vertical is my next most often used choice. You can click through the other settings to see the results of each and you can fine tune them using the sliders underneath. Again, you have the option to Constrain Crop as in the Crop & Straighten panel.
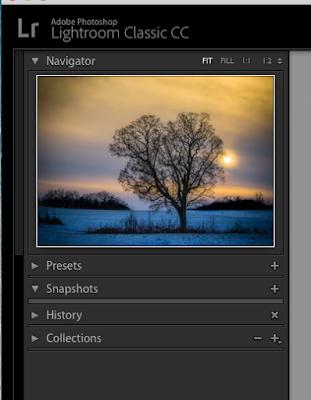
Here is a screenshot of Lightroom to show you where these tools are located.
I thank you all for your continued support! I wish you all the very best, most successful, inspiring, and amazing 2018. Make this the year you find your light!
See my Facebook page for my top ten favorite photos from 2017!
I love you all!
Happy New Year!


Comments
Post a Comment